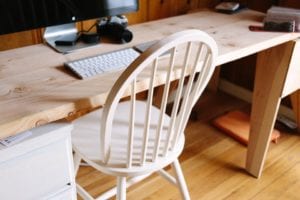
 The first loosened chair must be carefully disassembled into details. To disassemble the frame of the chair, you can use super heated steam from a boiling kettle, to the tip of which a thin rubber or plastic hose is attached. The ferry heats up the joint of the wooden parts of the chair, the old carpenter’s glue softens and now you can gently shake them apart.
Next, you need to remove the remnants of the old glue from the surface of the spikes and from the grooves. This can be done with a chisel, rasp, sharp knife and coarse sandpaper. After removing the glue, a rough (this is important!) Wood surface should remain. It is even possible to make transverse shallow notches with a rasp on spikes – then a new adhesive bond will be stronger.
If the old varnish cracked and peeled in some places, it is necessary to remove its remains with an emery paper. A grinder with a grinding wheel or grinding machine will significantly speed up this process. Only you need to work carefully so as not to spoil the surface of the tree. It is better to shoot slowly, slowly and gradually. If the varnish is firmly held, it is enough just to wipe it with a cloth dipped in acetone until a matte sheen appears.
Now you need to make in each spike cut along the long side to a depth of three quarters of the length of the spike. You will drive wedges into this slot to secure the connection. The length of the wedge is equal to the depth of cut, the width of the wedge corresponds to the width of the spike. The thin part of the wedge corresponds to the thickness of the cut, the thick part of the wedge is 2-3 mm larger than it, it depends on how much wood you removed along with the old glue.
Ideally, in the assembled spike joint, the wedge should push the spike parts apart so that they fit tightly against the walls of the groove of the part. No more. Otherwise, either you will not be able to drive the spike into the groove, or you will split the part along the wood fibers.
Now you can glue the chair. It is better to do this in parts: first, the left and right halves of the chair are assembled, then they are connected by bridges between themselves. At the same time, the back of the chair is assembled and glued. Joiner’s glue was good in past centuries, but now it has been replaced by epoxy two-component an epoxy adhesive. Mix the resin with the hardener strictly in the proportions specified in the instructions, mix thoroughly and you can apply glue to the parts in the following order:
- carefully and abundantly grease the groove of the part;
- grease thorn from all sides, including slot;
- lubricate the wedge on both sides.
- Do-it-yourself chair restoration
The connection is assembled as follows:
- insert a wedge into the cut a little, just to hold on;
- insert the part with a spike (with a wedge) into the groove;
- dry on the opposite spike, put the counter part and, through a wooden gasket,
- hammer the spike (coated with a wedge) greased with glue into the groove;
- first with light blows of the mallet, then
- with a little effort, so that the parts are tightly connected.
The wedge, resting against the bottom of the groove, as the spike enters into the groove will push it (spike) until it snaps firmly into place. The exposed glue is carefully removed with a chip and remove the residue with a cloth dipped in acetone.
Such an adhesive joint is most reliable – the spike will break off rather than start moving.
If necessary, for better fixation of the glued parts, they can be pressed to each other with clamps or rubber bands. Rubber harnesses from the expander is the best fit for this purpose.
When the glue dries in a day, you can proceed to varnishing or painting the frame of the chair. This should be done in a few steps to create a high-quality and durable lacquer coating. In the interval between the application of layers, the dried varnish is polished, then after the final varnishing the chair will have an absolutely smooth mirror surface.
Foam padding of the seat and back of the chair is covered first with a canvas (tarpaulin), then with upholstery fabric to your taste (tapestry, jacquard). The upholstery of old chairs was often fastened with decorative upholstery nails with large copper hats. If they are rubbed and polished, they sparkle with real gold, giving an ordinary chair the look of a royal throne.
After the repair and restoration of the chair with your own hands will be completed, it will still delight you with its exquisite lines of curved legs and back, keeping a particle of the great history of the ancestors.
Picture Credit: StockSnap
